


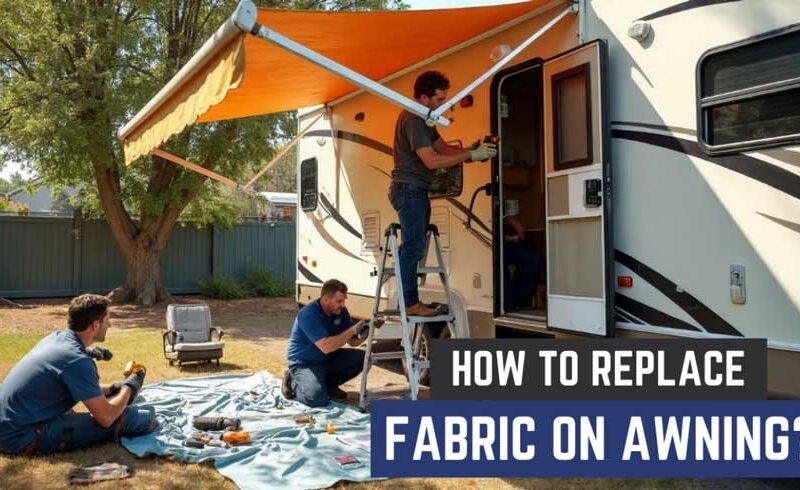
There may be various circumstances that require you to replace the fabric on your awning. Replacing the awning fabric not only makes it look more attractive, but also protects you from harsh weather conditions.
Professionals can help you replace your awning. However, with the right tools and measurements, you can do it on your own as well. So, if you think your awning’s fabric needs replacement, let’s check out how to replace fabric on awning – entirely on your own!
Tools You’ll Need
- Drill And 3/16″ Drill Bit
- Long Skinny Screwdriver Or Something Similar
- Small Hammer
- Small Punch
- Good Pair Of Vice Grips
- Sharp Knife
- 3/8″ Wrench
- Marking Tool
- Measuring Tool
- Sewing Machine
- Binder Attachment
- Cutting Tool
Materials
- Awning Fabric
- Awning Spline Cording
- Outdoor Thread
- Basting Tape
How to Replace Fabric on Awning: Step-by-Step Guide
Now we assume you have already gathered the tools. If you don’t already have the tools, and it sounds too much trouble, you can rest and let a professional handle it. Click for more info right here.
But if you have the tools ready, let’s follow the steps to make this process effortless:
Step 1: Extend the Awning
First, you need to extend your awning out about 12″. After that, securely place the head assemblies on each side of the awning. You can use zip ties to secure your assemblies. Then, remove the poly cord screw on both sides.
Step 2: Take the Roll Tube Off
At this point, you need to remove the roll tube. You can get some assistance to remove it safely. Detach the roll tube from both sides of the head assembly. Then, feed the tube through the awning rail and keep it on a safe surface to replace your fabric.
Step 3: Unroll the Fabric
Now, from any side of the roller tube, remove the end cap. You will undoubtedly notice three screws. Once you take out the cap, unroll the fabric slowly. You can seek assistance from another person in this step if you wish.
Step 4: Detach the Fabric
After unrolling the fabric, remove the poly cord screw attached to the it. Once you remove the screws from both ends, let another person hold one end of the fabric while you pull out the roller tube. Now, your new fabric is ready to be attached.
Step 5: Prepping Before Installation
Before you start installing the new fabric, you need to prep the track a bit. For this, you need to clean the track so the new fabric doesn’t get dirty. Also, use silicone spray to lubricate it adequately.
After that, check your new fabric for signs of tears and rips. If everything is alright, locate the poly cord on the side of your new fabric and ensure the bottom side of the fabric faces the roll tube.
Step 6: Install the New Awning Fabric
Now you need to push the poly cord through the track and ensure the fabric fits completely on the roll tube. Then, center the fabric and attach it to the poly cord on both ends using screws.
Once you secure the fabric, roll it onto the tube. Ensure that the fabric is securely attached and that there are no bumps.
Step 7: Reinstall the Roll Tube End Cap
Once you have rolled the fabric tightly, reinstall the roll tube end cap using the three screws. You can use a screwdriver to widen the awning rain before you install the roll tube back into the RV. Also, lubricate the rail as well for an easier installation.
Step 8: Check if the Fabric is Centered
Now, using both ends, slide the polycord tube through the railing and reinstall the tube into your awning’s head assemblies. Before installing the final screws, retract the awning a couple of times to ensure the fabric is centered correctly.
Step 9: Enjoy Your New Awning Fabric
Ah, it’s done! You have successfully installed the new awning fabric, and enjoy your outdoor moments to the fullest. However, be sure to maintain proper care and regular maintenance to keep it in good condition for a long time.
Avoid These Common Awning Fabric Replacement Mistakes
At first, installing an awning may seem easy, but even the most skilled do-it-yourselfers run into problems. To ensure that everything goes as planned, follow these steps to avoid mistakes that could mess up the job.
- AlwaysConfirm Measurements: Never estimate size, as guessing can lead to negative consequences. Measurements can be taken for the fabric track, and ordering should be done after taking measurements twice digitally. Attention to detail is advantageous.
- Never Pull Too Much:If the fabric gets stuck, don’t pull too much. Use silicone spray or mechanical lubricant to loosen any fabric restrictions instead. The gentler you are, the better outcomes you can expect.
- Align Fabric Properly:Before fitting the fabric into place, ensure it is facing the right way by checking it first. It is better to double-check than to leave things unverified and encounter difficulties during the tasks.
- Wipe Down The Track: Before applying the new fabric, make sure the track is free of grime. A dirty sliding surface makes the job harder.
- Look For Tears:Examine the fabric and the track for any tears. This prolongs the awning’s life, allowing for repairs or replacement to be done beforehand.
- Pay Attention To The Weather: Avoid working on the awning in strong winds or heavy rain. A calm day would work best.
- Don’t use makeshift tools: Using the correct equipment for the job, such as a fabric tension tool, improves accuracy and reduces effort.
Tips For Maintaining Your Awning Fabric’s Longevity
Caring for your awning will keep it looking good and will also improve its longevity. Here are some tips on how to properly care for and avoid damaging them.
Regular Maintenance
Regular upkeep is important in keeping the awning dust and grime-free. A soft brush and broom can be used to remove any accumulation of dirt to prevent buildup that can cause damage later on.
Removal Of Tough Stains
Washing the awning with a mixture of water and mild soap is an effective way to remove tough stains. It is essential to avoid using harsh chemicals that can cause weakness and fading of the fabric; instead, gentle scrubbing with a sponge or cloth should be employed.
Handling Pressure Washers with Caution
If you want to remove dirt, a pressure washer could do the trick. Remember to exercise caution with it, however. Maintain a fabric distance of at least 18 inches, and set the pressure to a low level to avoid damage, especially to the seams, from water pressure.
Check Your Awning Often
Regular checks are vital to identify any existing damage. Peruse for rips, tears, or holes, particularly after a storm or high winds. If you notice small tears, always aim to repair them immediately to prevent them from worsening.
Remove Mold and Mildew
Parts of the awning could be shaded or humid, leading to the formation of mold and mildew. Check for signs of mold and clean them thoroughly with a warm vinegar solution. Clean the fabric thoroughly afterward.
Waterproof Sprays Should Be Applied
To treat your awning from moisture, you need to apply waterproofing treatments. This helps inhibit water from soaking into the fabric and reduces mildew growth.
Avoid Damp Areas When Storing Fabrics
Try to avoid storing outdoor fabrics like the awning in warm and damp areas. A shed or garage would work best as the element of damage to the fabric is eliminated. Storing these fabrics in warm, humid areas would lead to the growth of mold and mildew, which should be avoided.
Bottom Line
Now that you know how to replace fabric on awning, you can easily do it on your own. However, in some cases, if you don’t have the right tools in hand, doing it on your own may not be wise. So, when you think that the job is too tough for you to complete, hire a professional and rest easy!